Introducing Team Workspaces
What are team workspaces? The team workspace feature is to help you collaborate with your peers and share a common workspace where everyone can work together. Each member can upload files, order transcripts, check the transcripts, view rates and invoices, etc. based on their assigned role. You now have the option to have a separate […]

What are team workspaces?
The team workspace feature is to help you collaborate with your peers and share a common workspace where everyone can work together. Each member can upload files, order transcripts, check the transcripts, view rates and invoices, etc. based on their assigned role.
You now have the option to have a separate team for each of your departments or for each of your projects that has a group working on it and have role-based access for each team member.
How can you create a team?
You can now create one or more teams using the Create Team button on the Settings page.
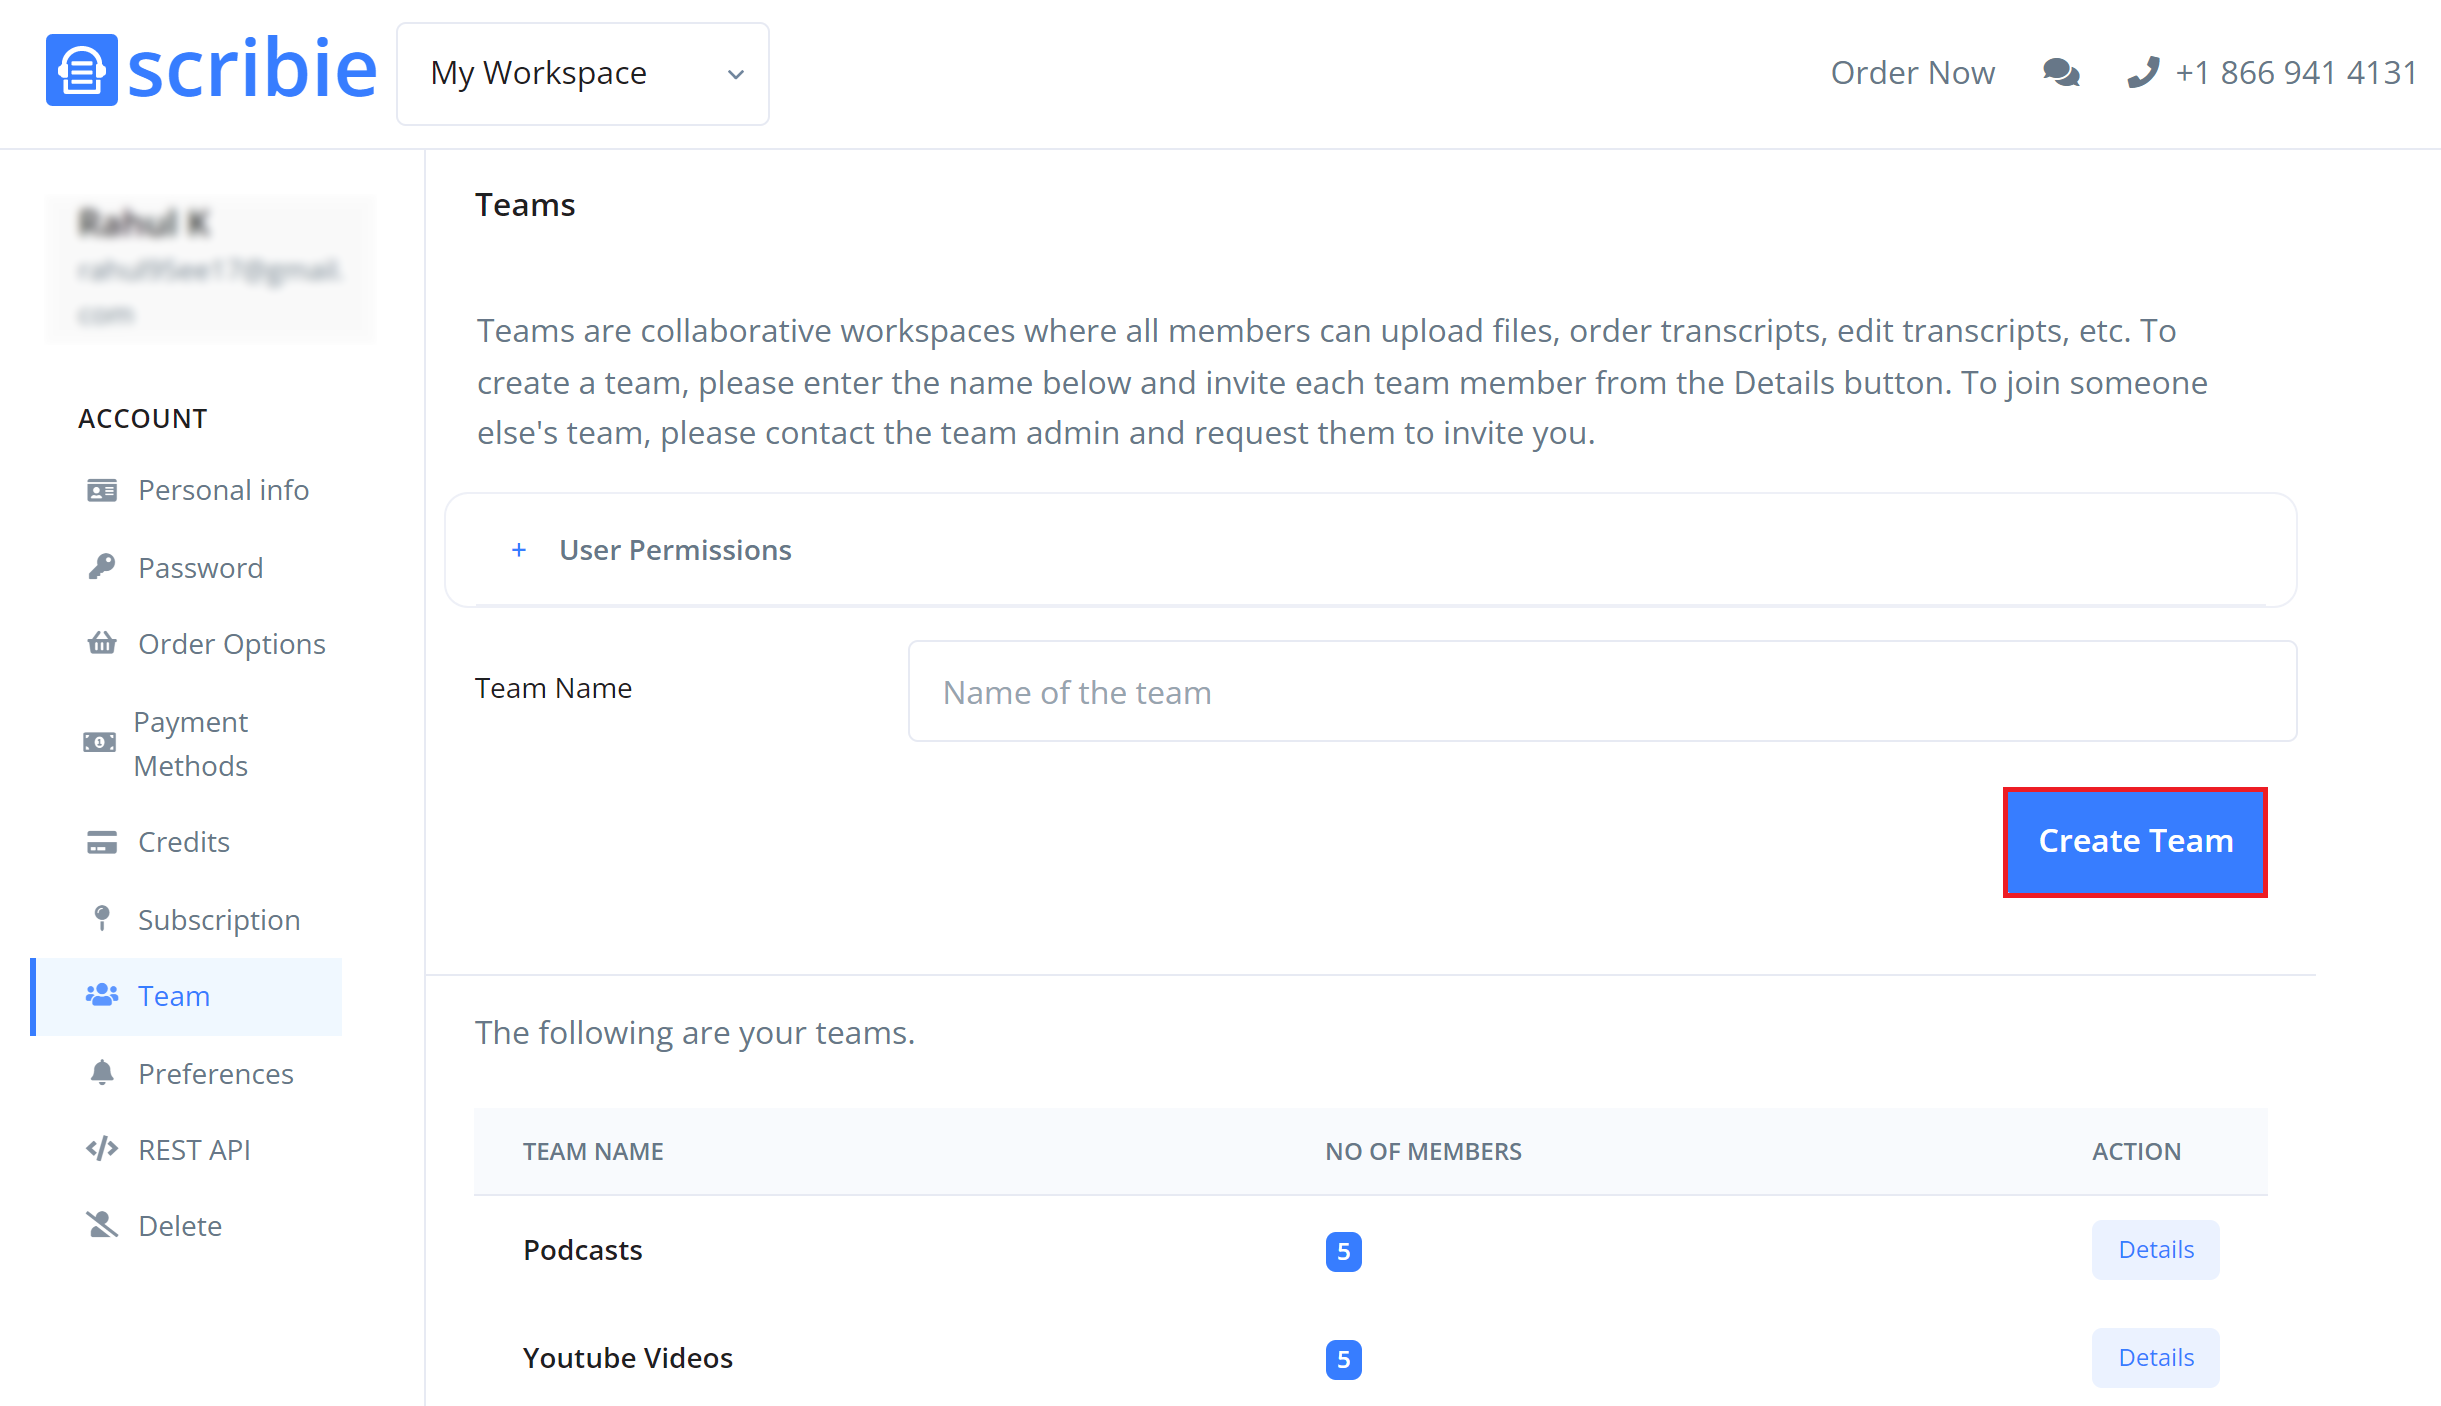
You can invite a different set of team members for each team. Click on the “Details” button for the team and use the “Add Members” button to add new team members. The members that you add will get an email with instructions for joining the team. They will be asked to create an account on Scribie.com if they do not already have one.
Creating a team for the first time will introduce you to the concept of workspaces on our platform.
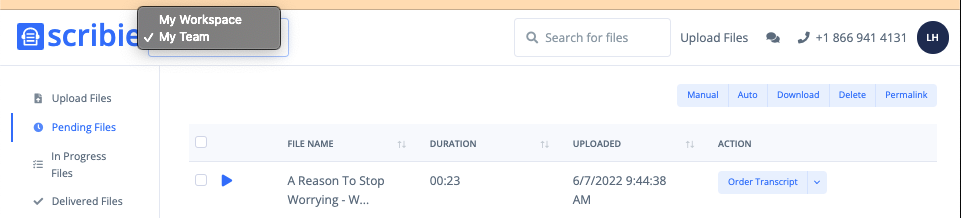
When you create a team, a separate workspace will be created specifically for it. You will start seeing a dropdown list on the files page on the top right that will allow you to switch between workspaces.
Your own private workspace will be named “My Workspace” and it will contain all the files and orders and will remain private to you. You can keep using this workspace to process files that only you have access to.
How can you assign roles based access to team members?
Click on the “User Permissions” to see the different roles based access for your team members
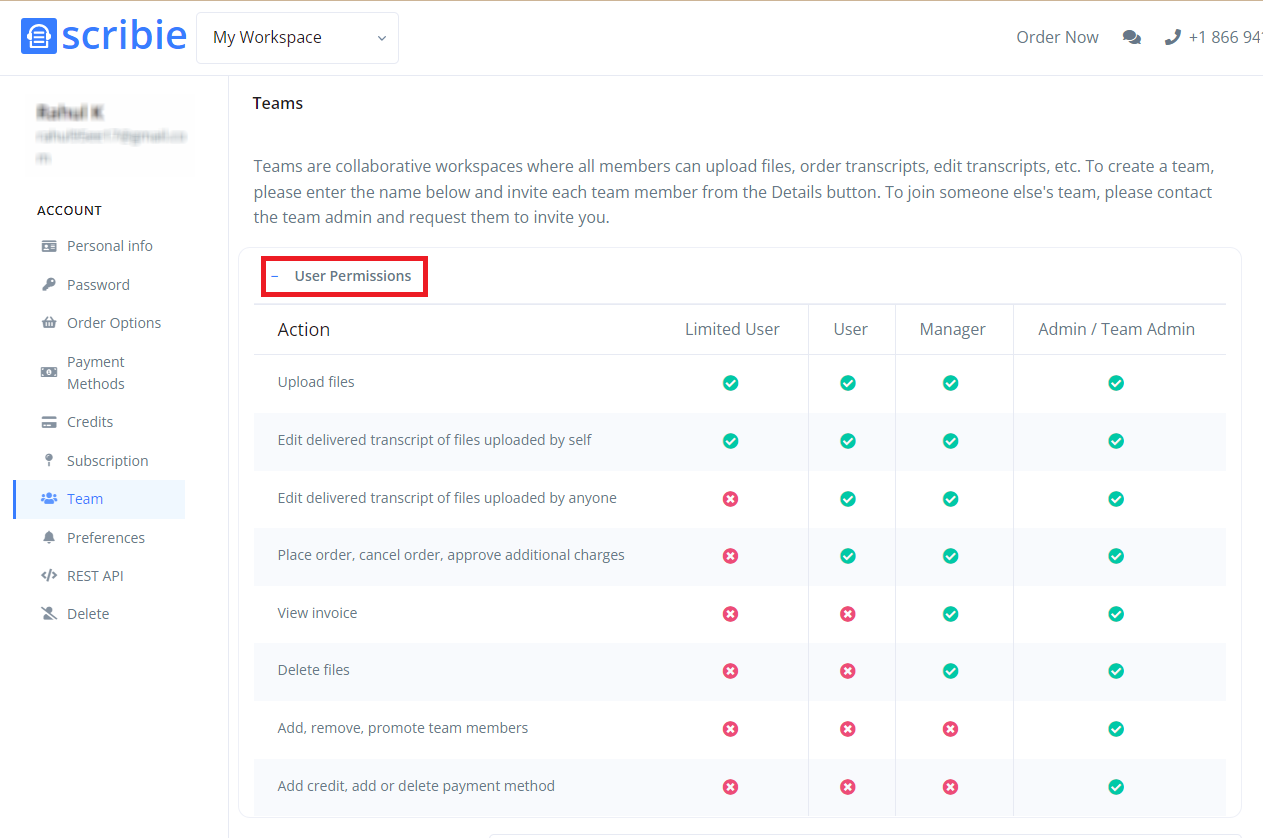
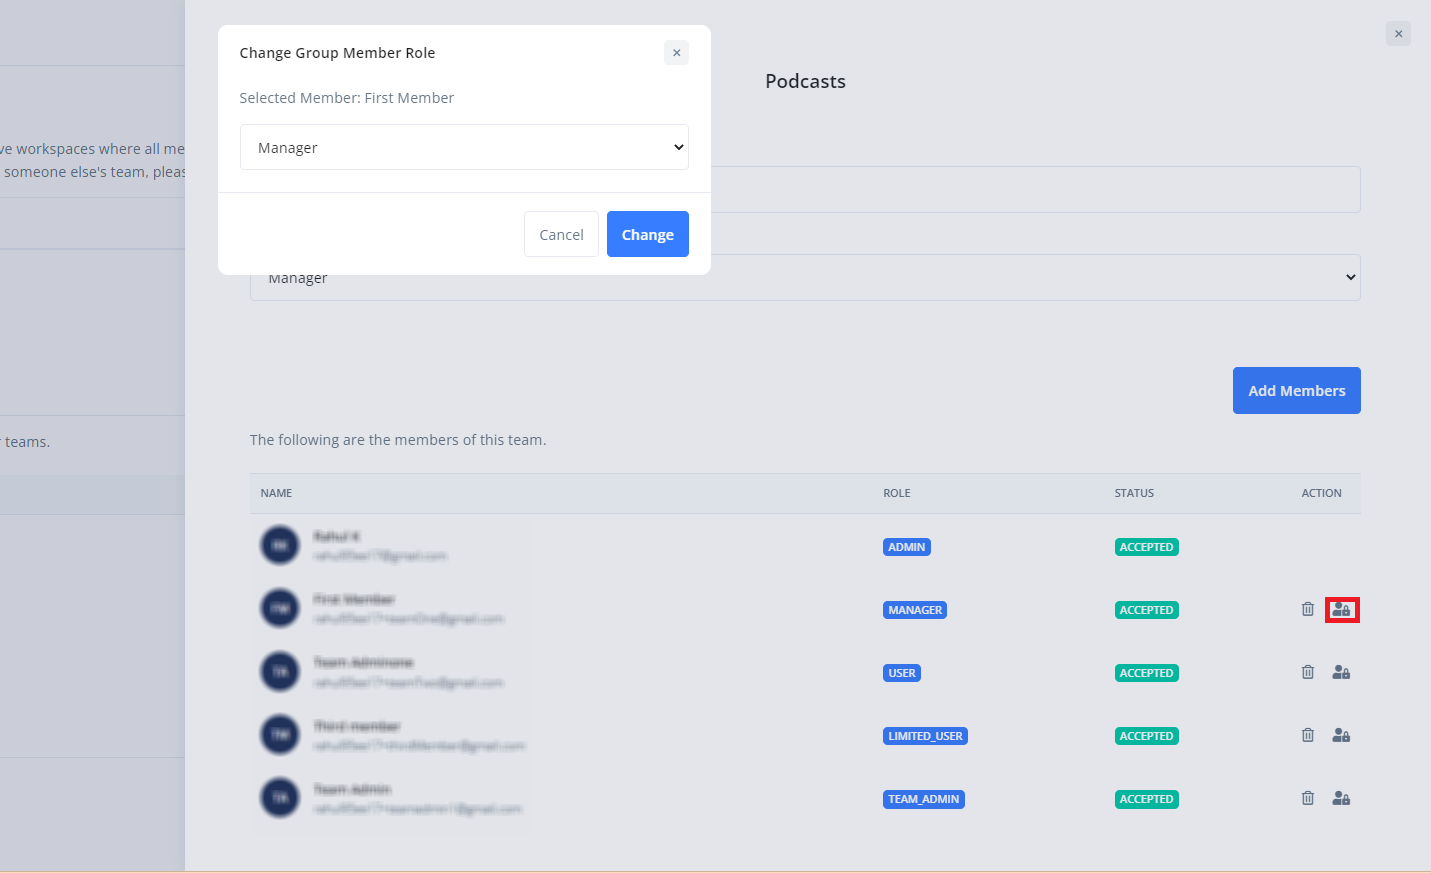
You can assign the role of Limited User, User, Manager, or Team Admin to your team members from the settings page by clicking on the “Details” button next to the team and then clicking on the user security icon under the “Actions” column. Select the role you want to apply from the drop-down menu and click “Change”. You (Admin and Team Admin) can reassign the roles for team members at any time.
How do I switch between different teams on my account?
When a team is created, a separate workspace is created specifically for it. If you are a member of that team, you will see a dropdown list on the files page on the top right that will allow you to switch between different workspaces.
Do members of one team have access to the workspace of another team?
No, members of one team do not have access to the files, transcripts, etc. of another team that they are not a part of.
All files that a member uploads, orders, etc after switching to this workspace will remain private to its workspace.
Who is the admin?
The person who creates the team has admin privileges by default and only they can add or delete members at any point in time.
How is the payment done for the orders created from the team workspace?
By default, the payment method of the admin will be used for any payments. If the admin has a Pro or a Custom subscription plan, then that benefit will be available to the team workspace too.
The admin can also add a separate payment method for each team from the “Payment Method” tab on the “Settings” page after switching to its workspace. Once the payment method is added for a team, the payment method will be visible to all team members while ordering or making any other payment.
Do I have my own private workspace for files that I do not want to share?
Yes, you do have you own private workspace. Your private workspace will be named “My Workspace” and it will contain all the files and orders. You can keep using this workspace to process files that need to be kept private.
Thanks to our customers for suggesting this feature. Please try it out today and send us your feedback on how we can improve it further.
Please do not hesitate to suggest any other feature, your feedback is welcome.
Comments (4)
- RRushda
Thanku so much 🥰
- VVipasha Gupta
Very nice
- MMostafa Mohamad
Thanks
- Aahmed nagy
thank you