So how do record Skype calls? Here’s how you do it with Call Graph.
Installation:
The first thing that you have to do is to download and install Call Graph client. Get it from here. Its completely free and certified by CNET. So you can be assured that it will not install any spyware/adware/crapware on your PC. What’s more, its completely free.
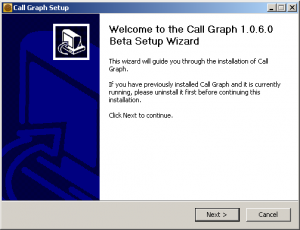
Save the installer to a directory and double click to run it. The installation wizard will start off, agree to the license and then click on ‘Next’ till it finishes. If you want you can modify the options during the installation. Here’s a screenshot of the installer.
Configuration:
After installation Call Graph icons should turn up on your Start Menu. Run it from there. The first time it runs, it might ask you to choose a directory where the Call Records are stored. It tries to guess but if it cannot, it just prompts. Once that is done, the Call Graph icon will appear on your task bar. Hover your cursor over the icon and it will show you the status.
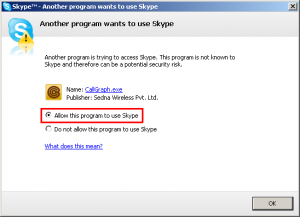
The first status it will show will be “Waiting for Skype connection…”. All Skype plugins have to be authorized by the user before they can connect to Skype. So Skype will display a dialog asking you to Authorize it. Once you click OK on that, its ready to record. Hover your cursor again and it should show “Connected to Skype. Ready to record…”. Here’s a screenhost of the Skype authorization dialog.
If you do not get the Skype dialog asking you to authorize then, you have to authorize the plugin manually. Go to the Skype ‘Tools’ menu, choose ‘Options’ and click on the last item ‘Advanced’ on the left hand navigation bar. Look for a link called “Manage other programs access to Skype”. Click on that and explictly give permission to Call Graph.
Recording:
At this stage you are all set to record. To check, right click on the Call Graph task bar icon and select ‘Start Recording’. You should get a notification saying that no calls are in progress. So go ahead and make a call. If you do not have anyone to call then call up echo123 (Skype’s test call service). As soon as the call is connected, you should get another recording saying that the call recording has started.
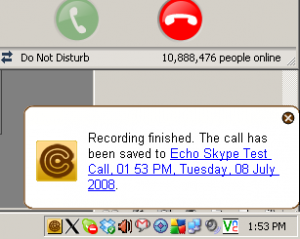
When the call ends, Call Graph will again notify you that the recording has been completed and the filename where it has been saved. Click on that link of the notification and you will be able to see your call record now. To play it back, just click on it. Your default mp3 player will be launched and you can listen to you recording.
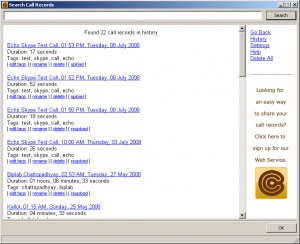
Each of the calls that you record will end up on your search dialog. To open the dialog anytime, double click on the Call Graph task bar icon. At the bottom of each call you will see options to manage the call record. You can either rename it, edit the tags and delete the file.
Tagging and Search:
By default all your calls are tagged with the name of your contact. So the ‘Echo Skype Test Call’ should have been marked with echo, skype, test and call tags. You can can add as many tags as you want to it. And then search with your tags. Type ‘echo’ in the text box on the top of the search dialog and press enter. You should see the Skype Test call record as a result.
To list all the calls from a specific contact, just type in the name and you should see it listed in reverse chronological order. The tagging and search feature has been designed to help you locate a call record that was made some time back. It takes away the pain of managing individual files in a folder. If you want you can still open your call record folder and play the call record manually.
Options:
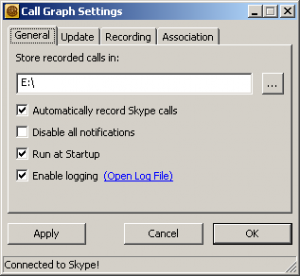
You can configure Call Graph to record call automatically or manually. The setting is in configuration dialog, ‘Automatically record Skype calls’ check box. If this option is enabled then recording will be started automatically for all your calls. If not, then you’ll get a notification when a call is made or received. You can choose to start recording from that notification.
You can also set the ‘Auto Update’ feature on or off. We don’t recommend turning the feature off since we are still in beta phase and release updates at regular intervals. Usually once a week.
You can also change the recording parameters. We support mp3 and wav encoding formats. For mp3 recording we support various bit rates and sampling rates. The default setting is 80kbps bit rate at 16 kHz sampling rate. Its good enough to record voice calls.
What else?
Nothing. That’s it. It’s that simple to record Skype calls. Download, install and authorize. You dont have to pay anything or hack to record a Skype call anymore. Try it out now. If you face any issues, we are always eager to help out. Get in touch with us here.

Hey Rajiv,
First off, Congrats on pulling off this amazing tool!!! God Bless you… It’s awesome!!! Next, the blog post is the most detailed help manual there is to the tool! Thanks for taking the time to write it out and accent it with screenshots!
This is sooooo un @braindead-ey 😉
Congrats once again for the work you’ve done…
Chao…
TheCruisemaniac.
hey ashwin.. thanks for commenting and trying it out.
Could you post something similar for Linux? Thanks.
@Eugeniu Will do. The only part which is different for Linux is the installation. You need to install Call Graph from the deb or rpm packages provided. Otherwise, rest of the steps are same.
[…] You are all set to start recording now. Try a call with ‘echo123′, which is the Skype’s test call service, and check if things are fine. Read more about recording here. […]
Thanks!
I’m just installing it 🙂
Do u have naything for Windows Mobile Phone REcorder…It will be owsome. nobody is able to do that yet…
Not right now. Right now its available only for Windows and Linux.
how can the linux version be completely uninstalled from system? Thanks
“sudo apt-get remove callgraph” should do it
Fantastic site, I really like your writing style. Very distinctive and concise. On a lot of blogs people just drone on and on, but not you – very nice. Keep up the excellent work! I find Voice over IP very interesting. I have learned a lot in implementing a small VoIP network at home, and am thinking of starting VoIP business in my area. There are a number of small businesses in my region that would benefit from it greatly.