
Follow these easy steps and get your Zoom cloud recordings transcribed
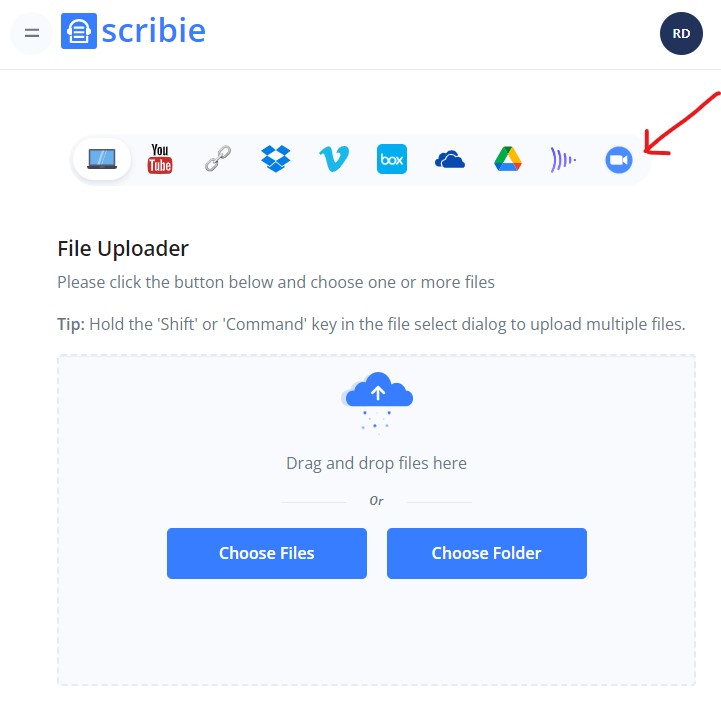
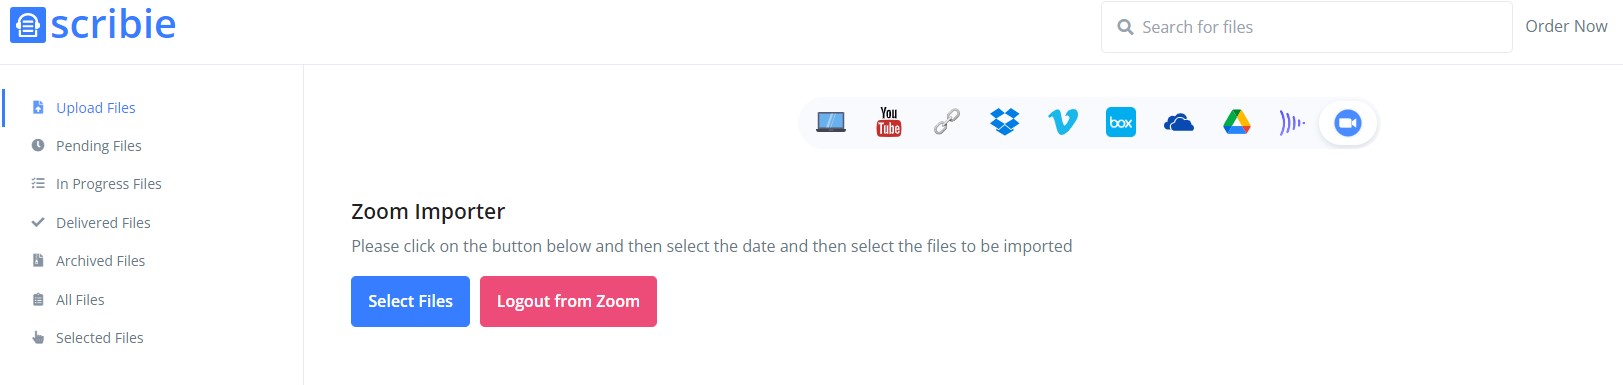
- Go to – https://scribie.com/files/#upload-files and click on the Zoom importer icon. Don’t worry if you do not have a Scribie account , you will be prompted to create one in later steps.
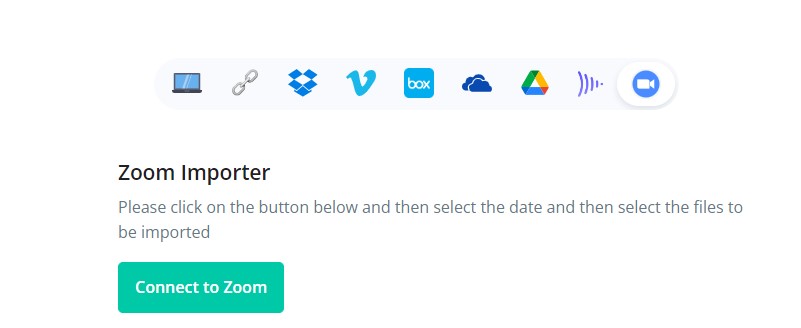
3. Click on the “Connect to Zoom” button to go to your Zoom cloud recordings.
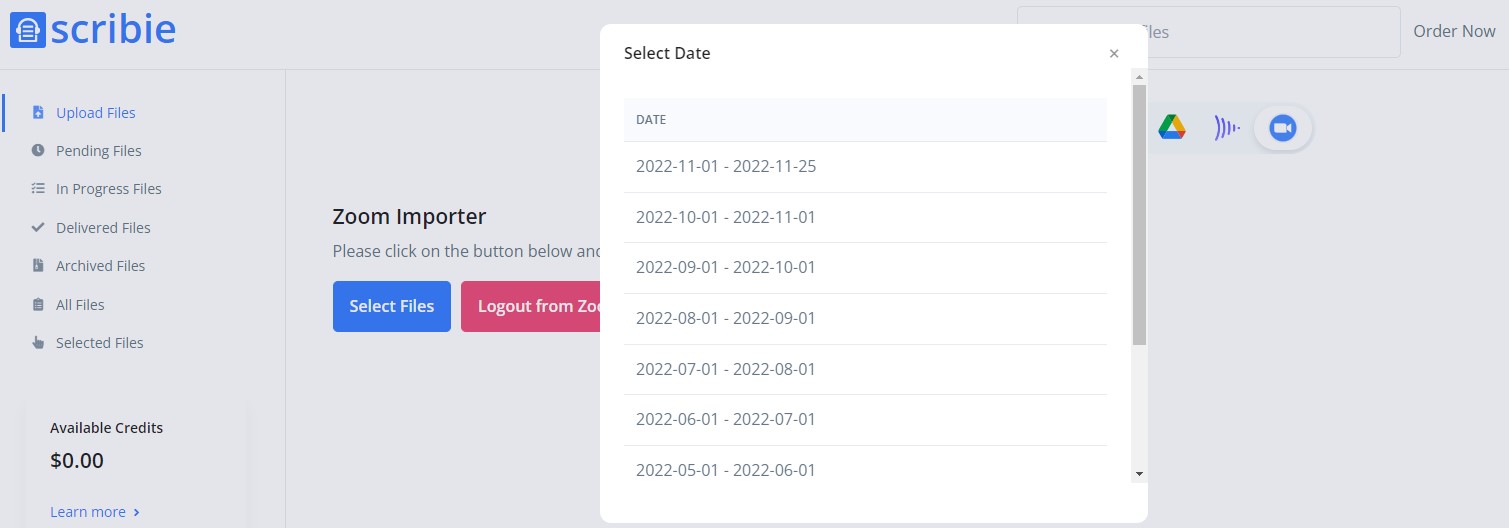
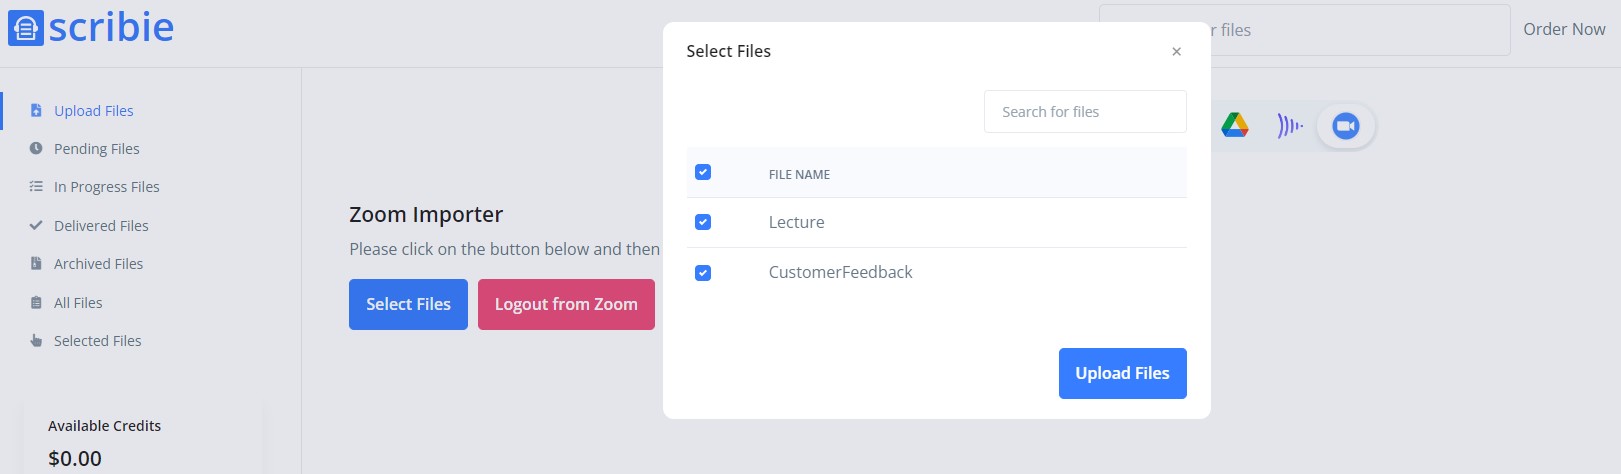
4. After connecting to Zoom, select the date of the recording and then the Zoom meeting recordings that you want to get transcribed.
5.Click the “Upload” button to start the upload.
6. The file will go to the “Pending Files” tab.
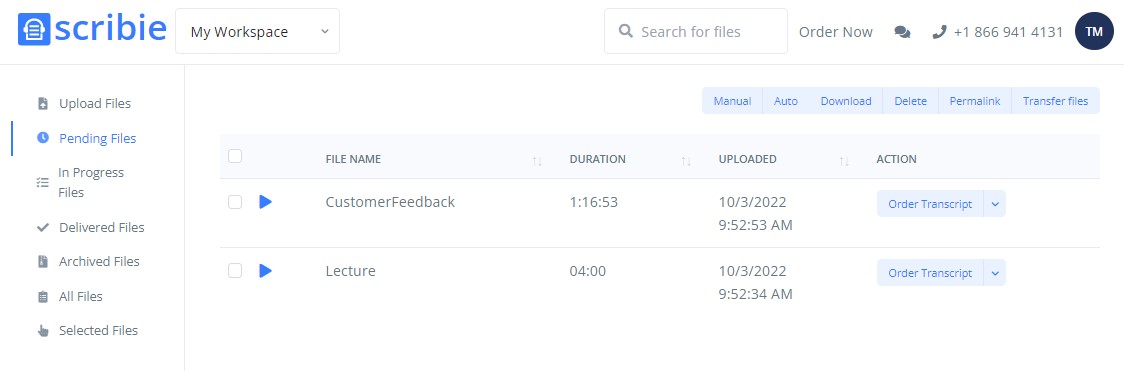
7. Hurray ! You are now all set to order. You can click on the “Order Transcript” against each file and either order Automated or Manual transcription. If you had not signed in or do not have an account , you will be prompted to complete the action before completing the order.
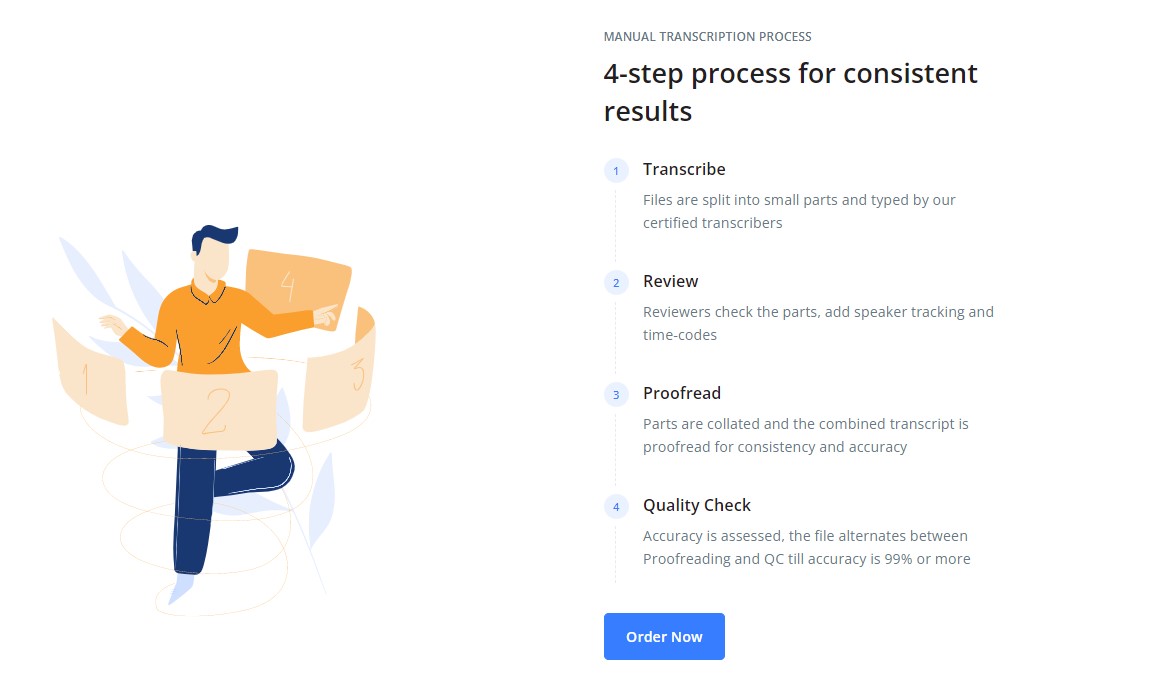
Your Automated Transcription order will be ready very fast within 30mins. Manual Transcription has a 4 step process where it will be transcribed, reviewed, proofread and quality checked by experts and delivered within 12 to 24 hours.
Once your automated or manual transcription is ready, you will see them in the “Delivered Files” tab of your Scribie account. The transcript downloads are available in docx, pdf, txt. odt, vtt and srt format.
8. You can disconnect your Zoom account anytime by clicking the “Logout from Zoom” button on the “Upload Files” page. Once you are logged out you will see the “Connect to Zoom” button as shown in Step 3.
For any questions , please contact us.