Once a file is delivered, it is important to quickly review it for accuracy and fill in any blanks the transcribers were not able to decipher. Typically, this review process may take around the duration of the audio or video file. However, depending on the audio quality, it may take you twice or thrice the audio/video duration to do this review/check.
To make the review process easier for you, we recommend following the steps detailed in this blog to review your transcripts more efficiently. These tips will help you save time and ensure the high quality of your transcript.

Step 1: Use the Scribie Online Editor
Scribie has developed in-house an online tool that integrates the transcript and audio/video files in one interface. We have written this blog to show the latest look and feel of the new Editor that was released last Q4 of 2021 (our version 2 of the Scribie Editor and we call it the new Editor) and show the latest available features.
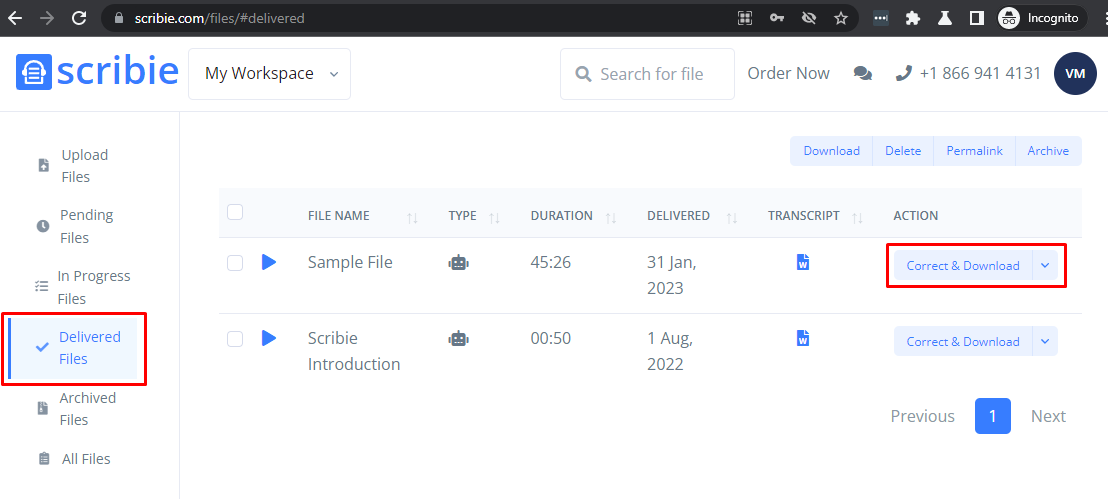
To launch the new Editor, just log in to your account, go to the Delivered Files page, and click the ‘Check & Download’ button for the manual transcription order, or the ‘Correct & Download’ button for the automated transcription order.
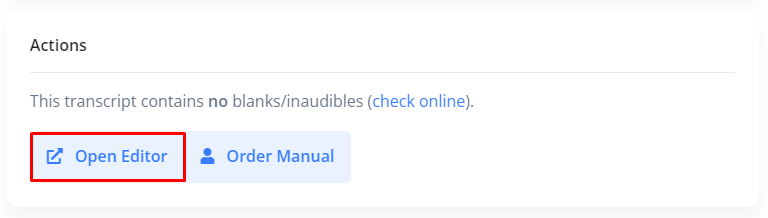
After that, a sidebar will appear. Please click on the ‘Open Editor’ button to launch the Editor.
The browser that works best with the new Editor is Chrome or Chrome Incognito browsers, so we recommend using either of them.
Some of the most important features of the new Editor for reviewing the transcript are as follows:
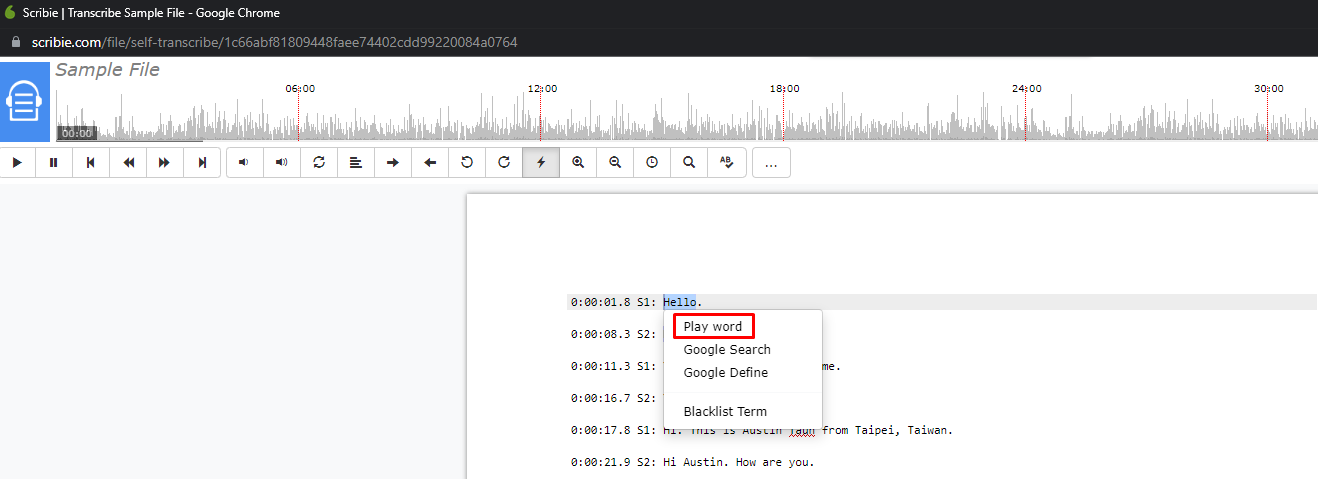
1.1 Play Word
This feature will play the word you have double-clicked or highlighted in the transcript so you can easily navigate and check the portions you want to re-check. You can also click on any part of the audio waveform at the top of the Editor to play that portion and the transcript will jump to that point so you can follow along.
To see a description of all the buttons on the new Editor, just mouse over the button or icon for the tooltip.
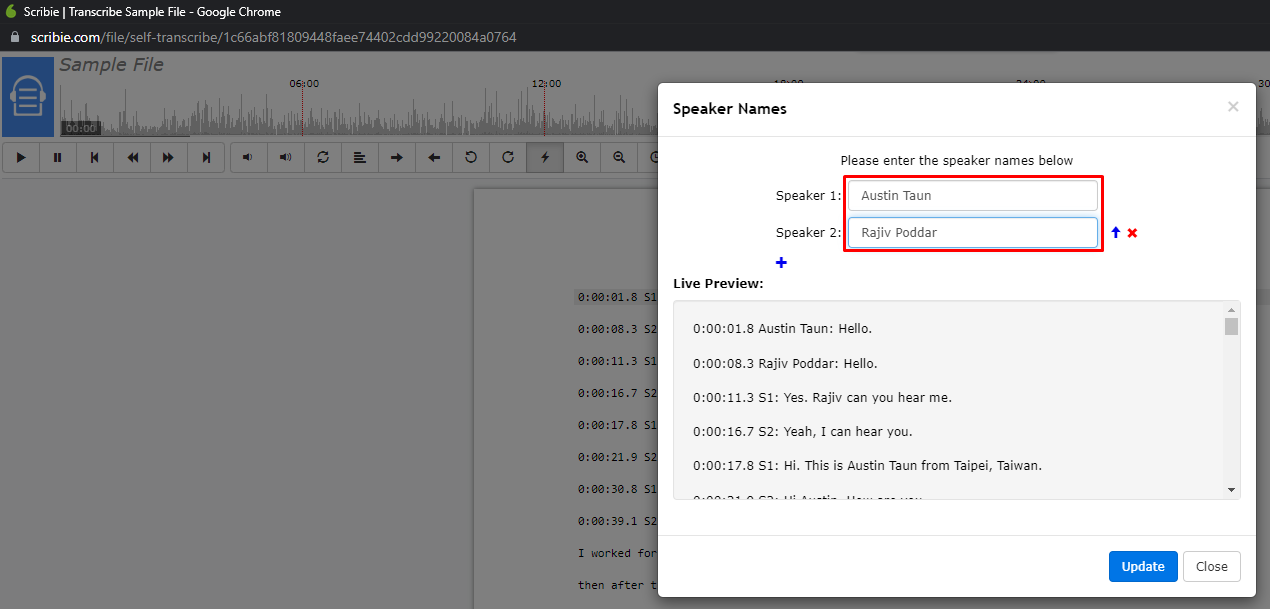
1.2 Speaker Names
If you want to change the speaker tracking or how the speaker names are shown, please use the ‘Update Speaker Names’ icon.

Once you click it, it will show the Speaker Names box. You can change the speaker names, add speakers, etc. We have added the Live Preview section so you can see how the update will affect the transcript. Once you click the Update button, the change(s) will be applied to the whole transcript.
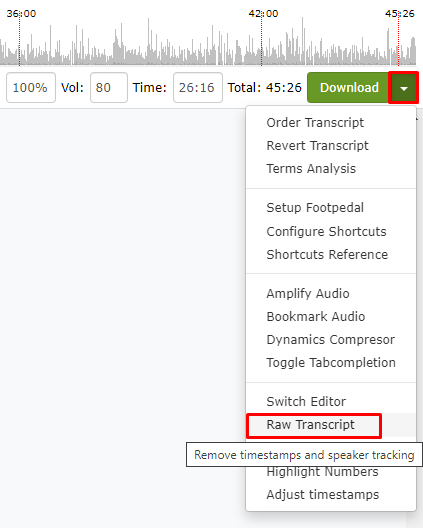
1.3 Remove Timestamps & Speaker Tracking
If you do not want to see the timestamps and speaker tracking, we have a feature called ‘Raw Transcript’ for that. Once you choose it, the transcript will only show the raw transcript without any timestamps or speaker tracking.
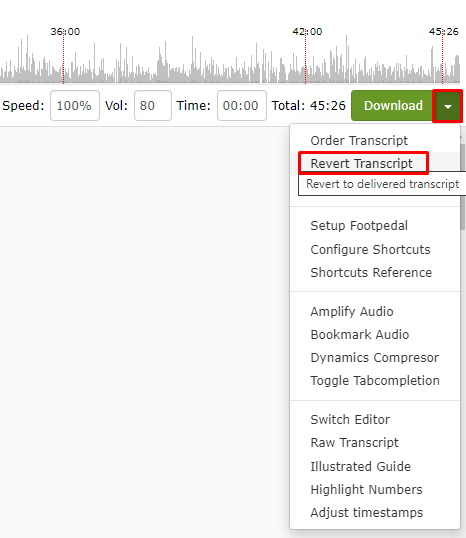
If you changed your mind and wanted to add back the timestamps and speaker tracking, please use the ‘Revert Transcript’ feature. It will revert the transcript to the delivered version and discard all the changes made to the transcript.
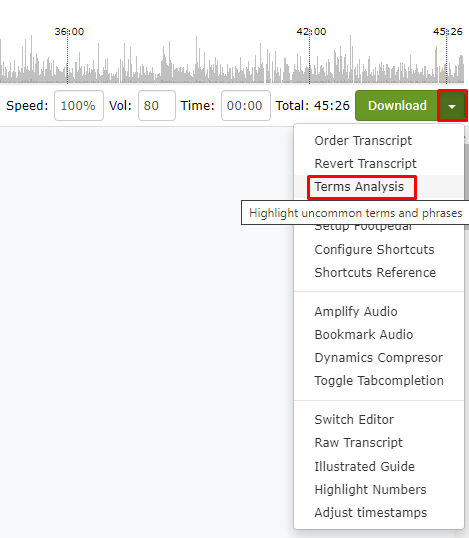
Step 2: Run Terms Analysis
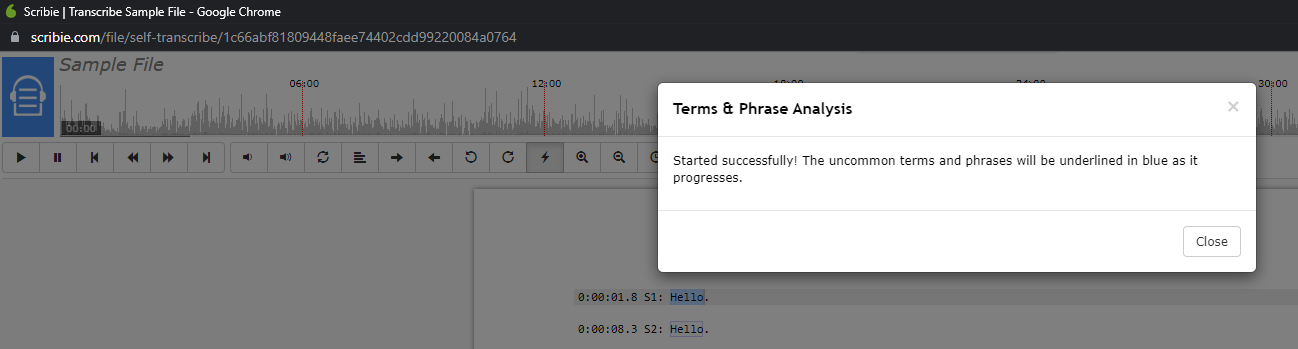
To see the uncommon terms and phrases in a transcript, please click on the ‘Terms Analysis’ option on the dropdown menu on the upper right side of the Editor. Any uncommon word or phrase will be highlighted in blue and these likely have major mistakes.
The analysis/process may take a few minutes to complete (3-5 minutes) so you can do the other steps while it is processing.
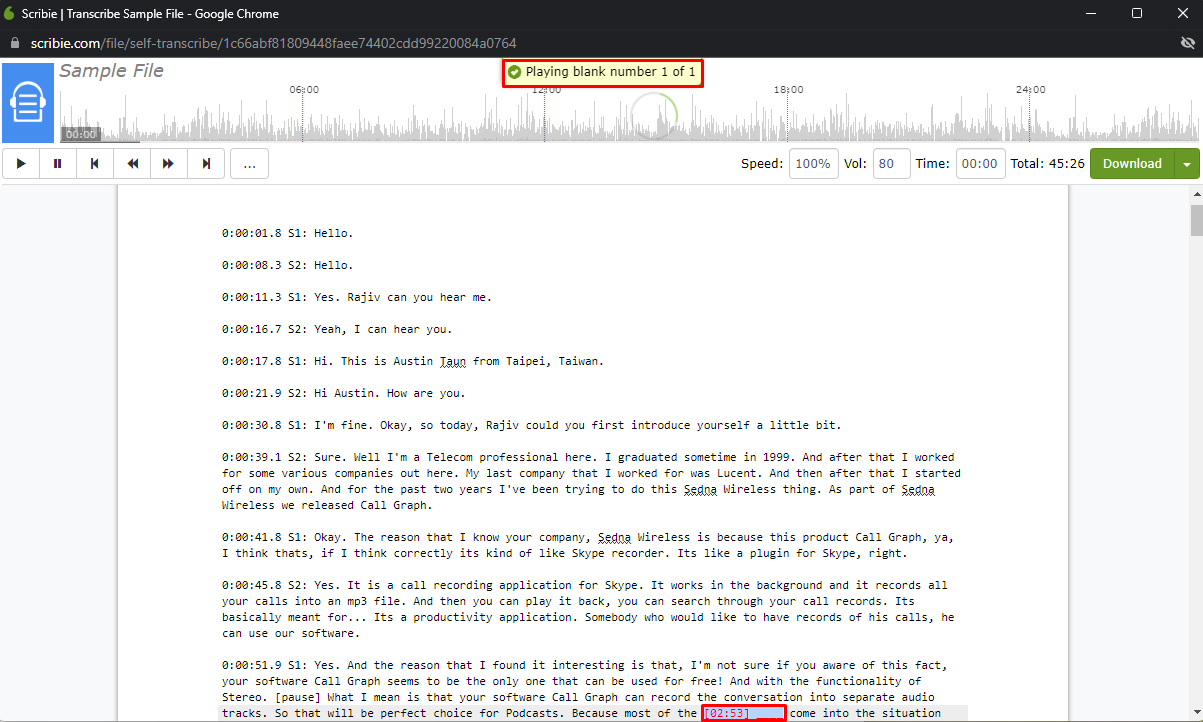
Step 3: Check the Blanks
During the transcription process, if our transcribers are unable to decipher certain portions of the audio due to them being inaudible or having overlaps, the speaker is muttering, etc., our transcribers will leave a blank. The blanks are also highlighted so you can easily see them. We also sometimes leave our best guess beside the blank. Please use the shortcut Ctrl+B to cycle through the blanks and erase/replace them as needed.
Step 4: Do Random Checks
We recommend the sampling process for more efficiency when checking the transcript. The process is to play 1-minute chunks of the file every 6 minutes. If you see a major mistake in that portion, please check the complete paragraph. To play the whole paragraph, just ensure the cursor is in any part of the paragraph, and then press Ctrl+Alt+N.
Doing sampling, as opposed to checking the complete transcript, will save you more time and effort.
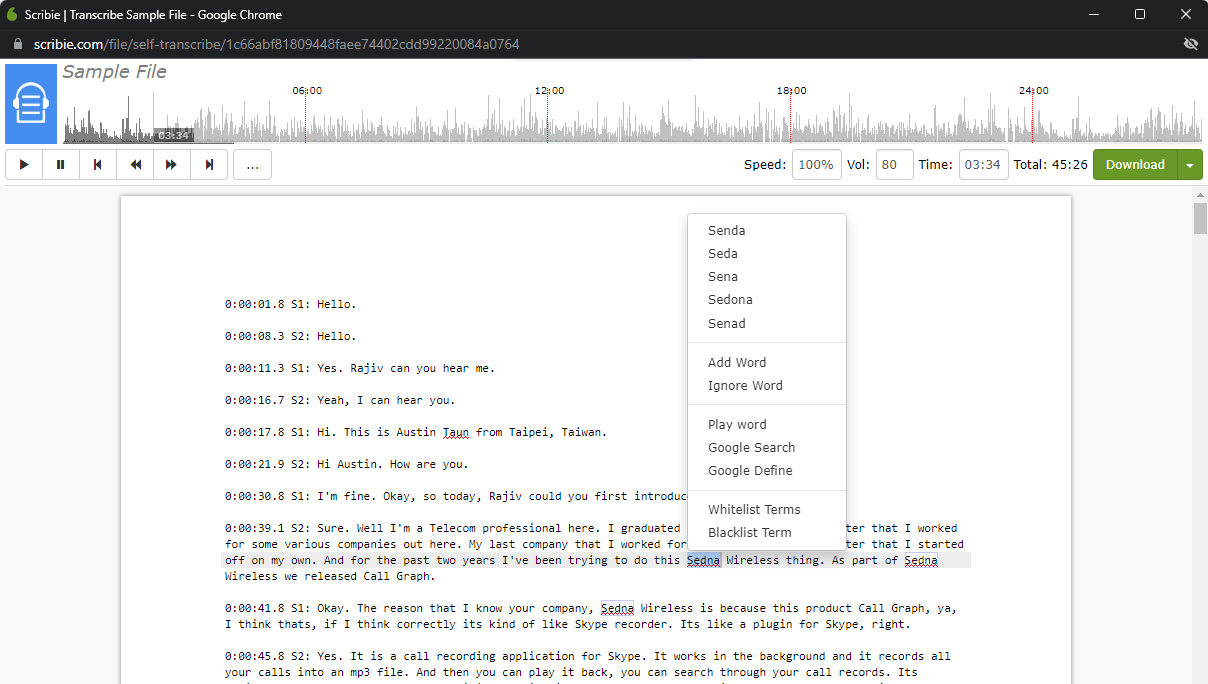
Step 5: Scan the Underlines
At this step, the Terms Analysis will already be complete. Please play the portions or the paragraphs with blue underlines to ensure there are no mistakes there.
The red underlines are the terms that are spelled incorrectly. Please right-click on the red underlines to see spelling suggestions, or play that portion to check and correct as needed.
If you review the file and it has more errors than expected, please order a free re-review of the file. The file will be proofread again and re-delivered, taking into account any instructions you placed.
If you have any questions, concerns, comments, or feedback, please let us know via the Contact Us page.
Thank you for considering Scribie!