Beginners Guide to Burning Subtitles into Videos [Add Open Captions for Free]
Learn how to add subtitles to your videos for free so that you can make your video content accessible to a larger audience. Whenever you’re creating video content, it takes time for you to conceptualize, write a script, and think of ways on how to make your video effective and potentially viral. Have you experienced […]
![Beginners Guide to Burning Subtitles into Videos [Add Open Captions for Free]](/_next/image?url=https%3A%2F%2Fscribie-wordpress.onrender.com%2Fwp-content%2Fuploads%2F2021%2F02%2FGuide-to-Burning-in-Captions-1.jpg&w=3840&q=75)
Learn how to add subtitles to your videos for free so that you can make your video content accessible to a larger audience.
Whenever you’re creating video content, it takes time for you to conceptualize, write a script, and think of ways on how to make your video effective and potentially viral.
Have you experienced producing a supposedly well-made video but wondering why the engagement is not as high as expected?
Maybe, it’s time to revisit your work and check if you have included captions.
Perhaps, your audience can’t appreciate your video because they find the conversations difficult to follow.
Adding video captions, a way to boost engagement, is often overlooked by video creators.
Verizon Media study shows that videos with open captions included led to 42% increased emotions of the viewer.
Now, that’s an opportunity you wouldn’t want to miss!
You can easily add captions to a video file without breaking the bank.
As long as you have an accurate transcript, you can use free, open-source programs like HandBrake to burn-in your subtitles.
If you’re not sure where to start, let us guide you through the process.
Preparing Your Caption
Regardless of what platform you will be using, it would be best to have your captions ready.
You can either prepare the transcripts yourself or opt for a transcription service to prepare the file for you.
The common subtitle formats are SRT and WebVTT.
SRT file is short for SubRip subtitle file that contains the text for the captions. It shows captions along with the start and end timecode.
On the other hand, WebVTT is like SRT but will allow you to customize captions, formatting, and change the colors with CSS.
Open or Closed Caption?
Once you have your subtitle file ready, you need to decide whether you will be using open or closed captions.
What’s the difference? Open captions are permanent, while closed captions give the viewer an option to toggle them on/off.
What are the drawbacks?
Open captions can be bothersome for some. The text of your subtitle will also depend on the quality of the video. If your video is low-quality, the text may become blurry and difficult to read.
On the other hand, closed captions will typically work with video platforms as long as they support closed caption files. Just consider that if your audience has limited technology options, turning the subtitles on may not be easy.
What Video Software Can You Use?
There are several popular apps in the market that you can use for adding subtitles. To name a few:
- FFmpeg
- Kapwing
- Jubler
- Movavi Video Editor Plus
- HandBrake
We recommend HandBrake as it’s a free and easy way to add subtitles to videos.
Burn-in Subtitles to Your Videos Using Handbrake
Download HandBrake
First, you need to download HandBrake. They support multiple operating systems – Windows 7, 8.1, and 10, macOS, and Linux.
HandBrake looks like this after the initial installation.
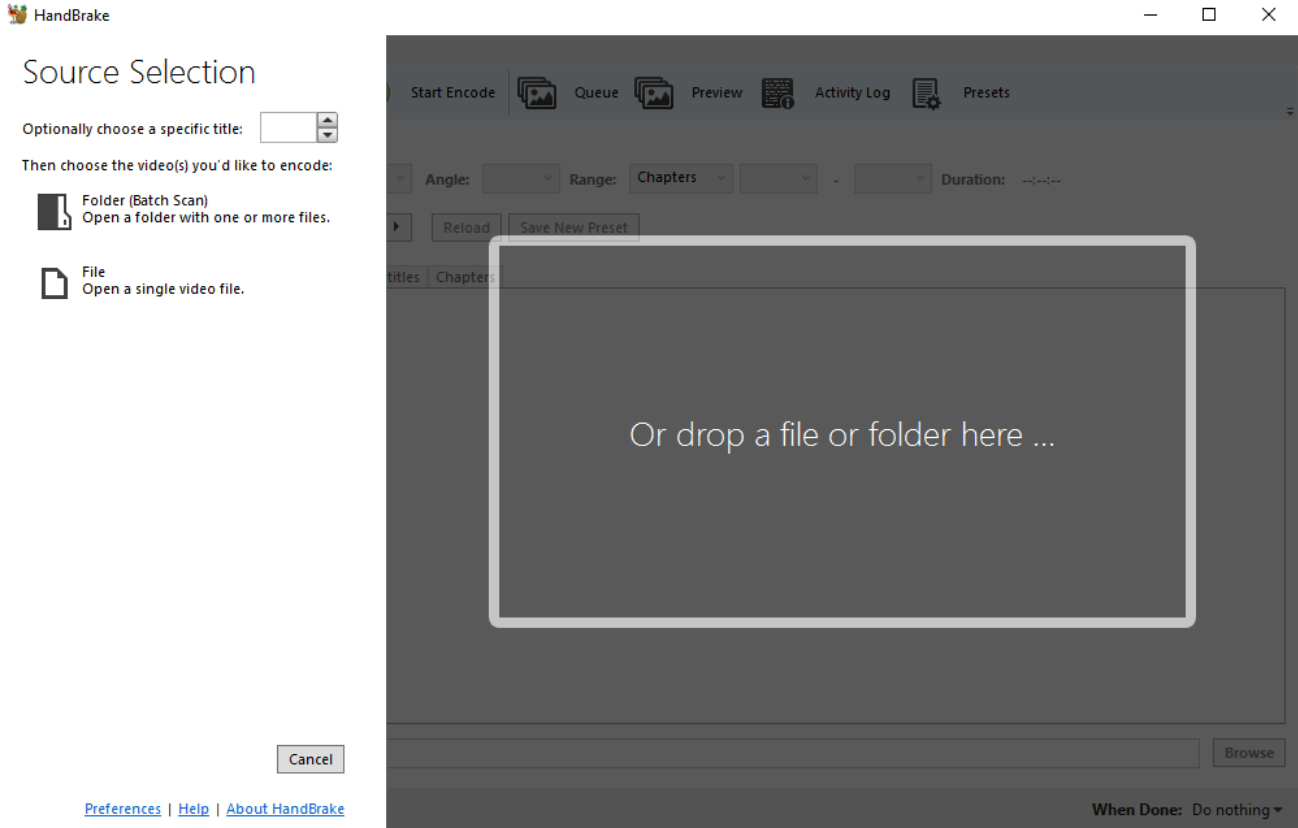
Select Your Video
You can click the folder icon to select the file from the file browser. Otherwise, you can drag and drop files for convenience.
Once you have uploaded the file, it will show you the rest of the controls of HandBrake.

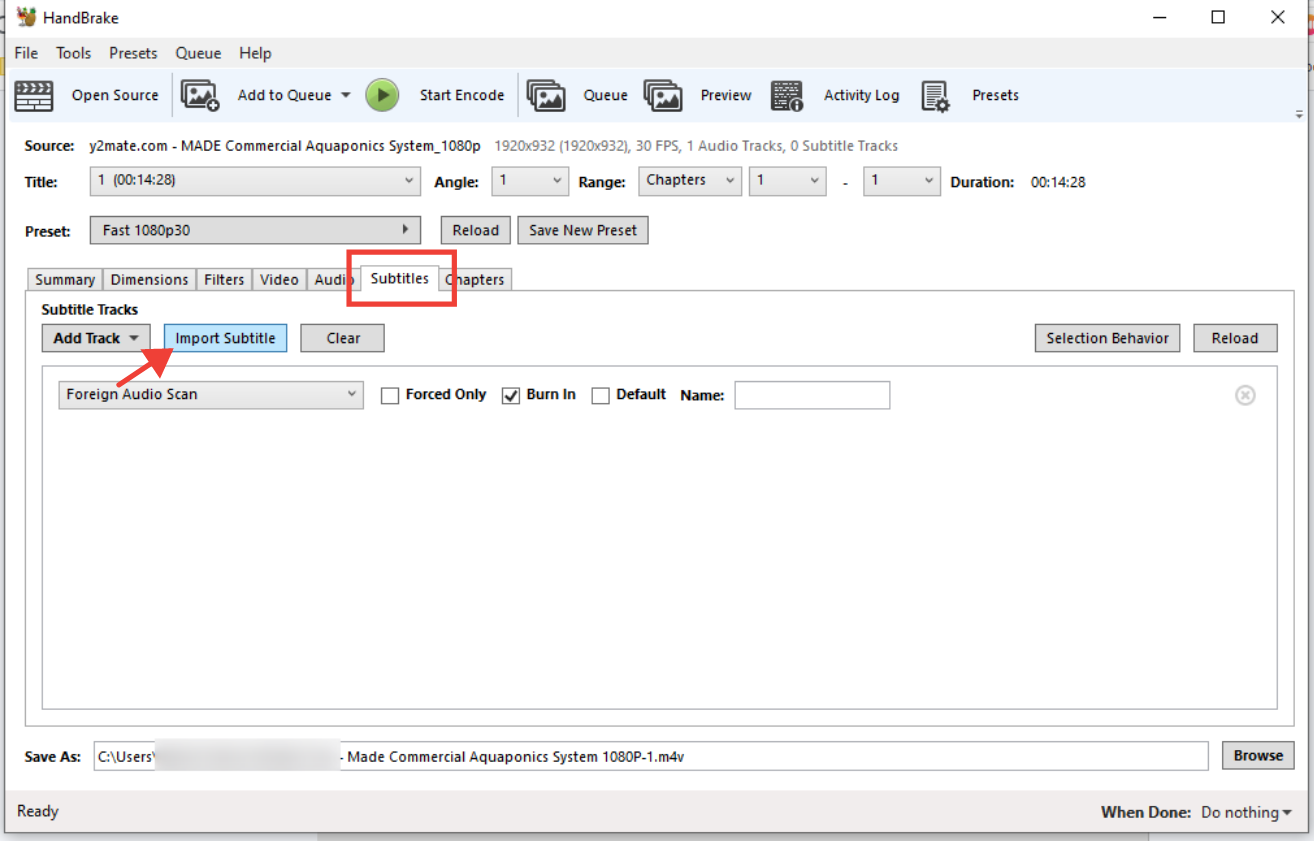
Add Your Subtitle File
HandBrake uses CEA-608 closed captions. To keep it simple, CEA-608 closed captions are white letters inside a black box and cannot be customized, unlike CEA-708.
To add your subtitles, click on the ‘Subtitle’ tab then ‘Import Subtitle’, to upload your file. HandBrake supports SRT, SSA, VobSub.
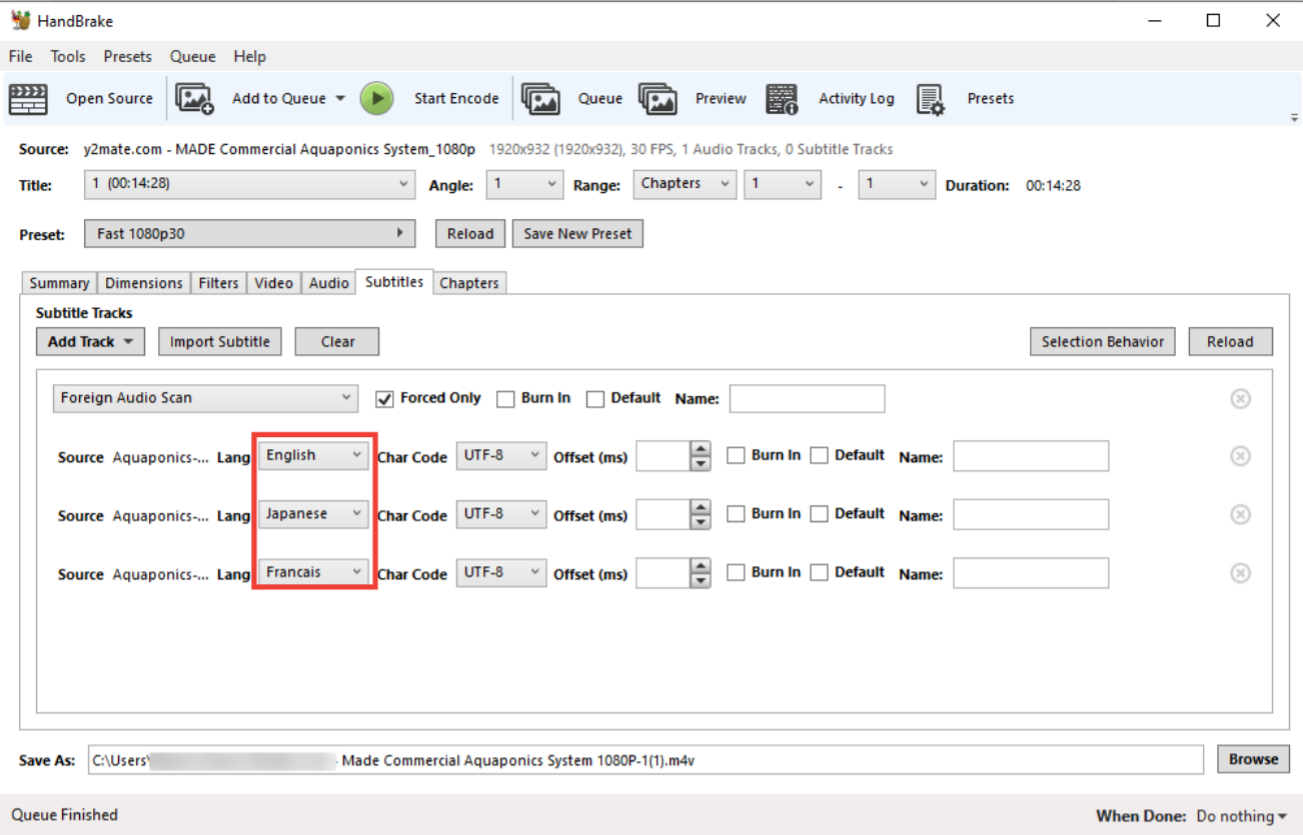
If you have subtitles in different languages, you can upload them and select the right language from the dropdown. Make sure that you specify the SRT language for any foreign subtitle tracks.
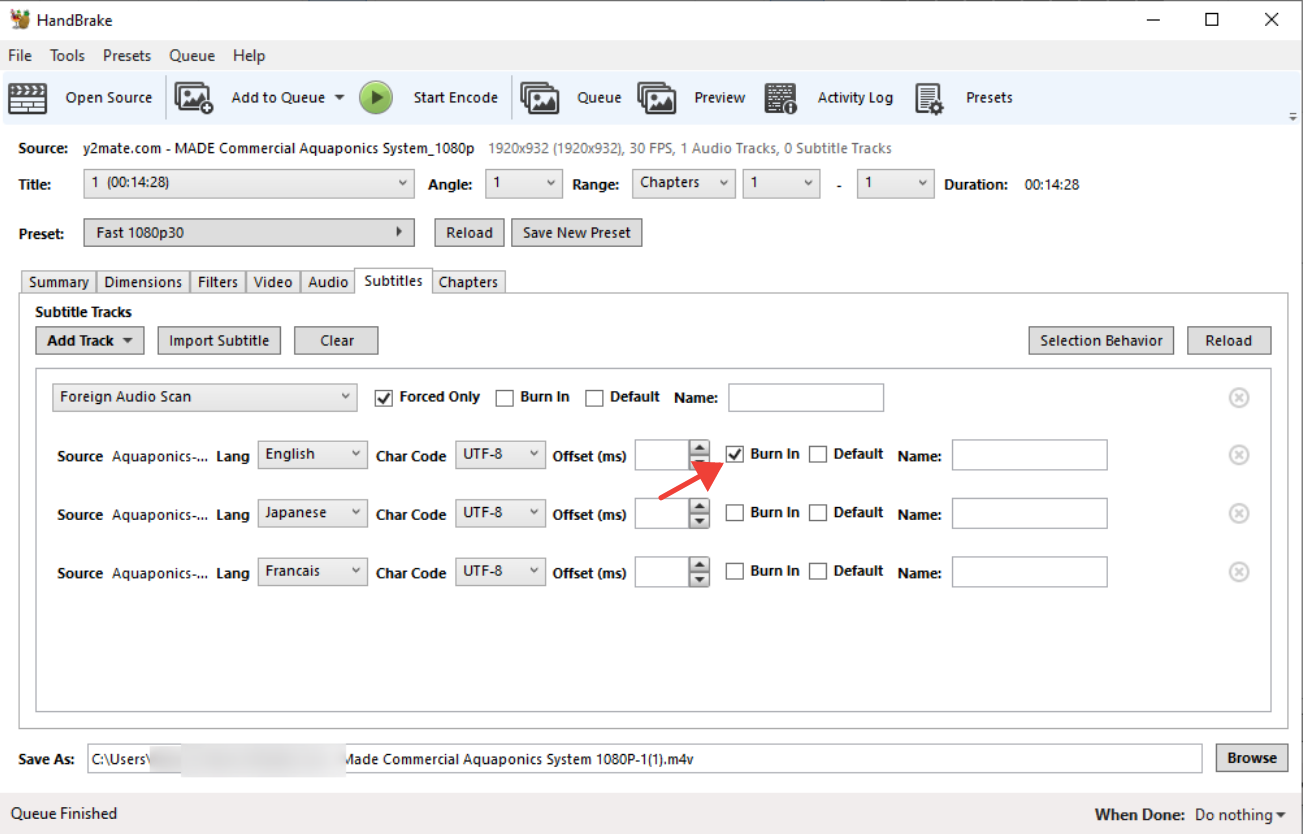
Pick Whether You Are Going to Upload Open or Closed Captions
If you want the subtitles to be permanent with no option for the viewer to turn it off, check “Burned In” tick box.
If you want to give your viewers the option to toggle on/off the subtitles, simply skip ticking the “Burn in” option.
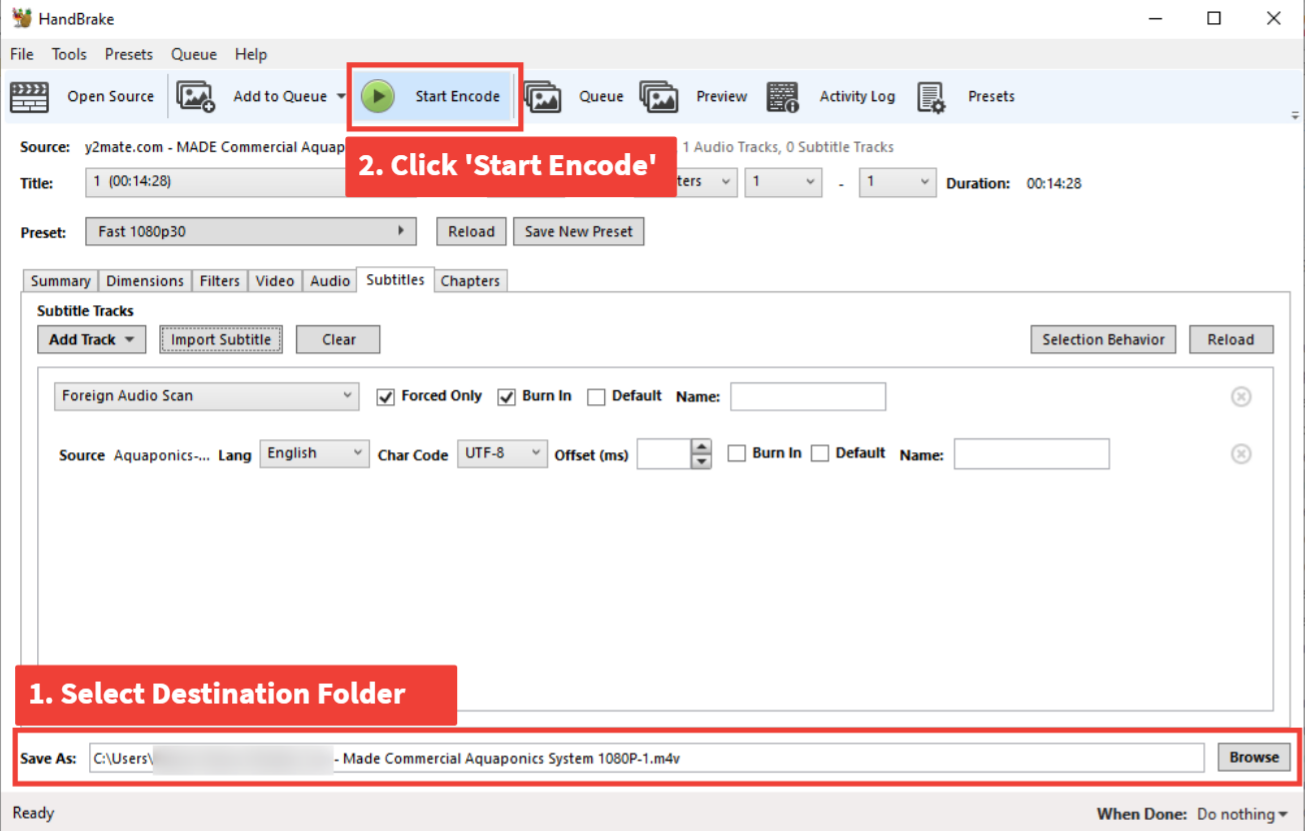
Set Destination and Start Encoding
Once you have uploaded your subtitles, you can specify the export destination folder by clicking Browse and the file name next to Save As.
When you’re ready, click “Start Encode.”
Test Your Subtitle
Test if the subtitles are working by opening your media player. You may choose an app like the free and popular VLC Media Player.
For Open Captions or Burnt-In Subtitles, you would see the captions as soon as you start playing the video. There is no option to disable the captions when you access them from the menu.
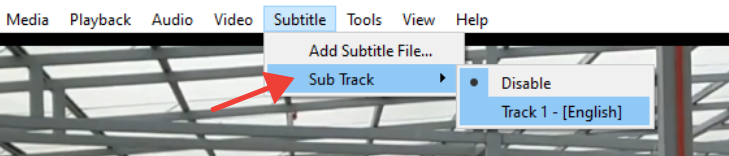
For Closed-Captioning or Subtitle files, on an app like VLC, you need to go to the Subtitle menu and turn on the subtitle. Once it’s turned on, the subtitles will appear at the bottom of your video.
Over to You
Videos can help you promote your brand and adding open captions will make your ad understandable and remembered.
Fortunately, adding them to your video is a simple task that will give you a positive return on investment.
You can generate your own captions if you have the time and editing resources.
If not, you can always rely on transcription services like Scribie.
We offer both automated and manual transcription and support SRT/VTT subtitle file formats.
Paired with great content and cinematography, captioning is the final addition that your videos and your audience deserve.
Need help with transcribing your video? Upload your file and let’s get started.
Comments (0)
No comments yet. Be the first to share your thoughts!